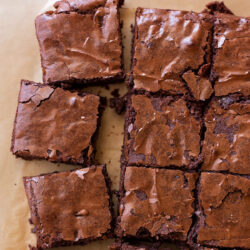
Experience the ultimate Dairy Free Brownies bliss! Ready in a quick 45 minutes, these homemade, thick, and chewy delights prove that you don’t need dairy to achieve brownie perfection.

You won’t be able to tell these scrumptious brownies are dairy free! They are chewy, fudgy, full of chocolate flavor with a thin flakey layer of meringue on top.
Instead of traditional ingredients they’re made with oil (coconut or canola) and have cocoa powder instead of melted chocolate. I also added in some chopped dairy free chocolate chunks to them so that they would taste more like a traditional brownie.
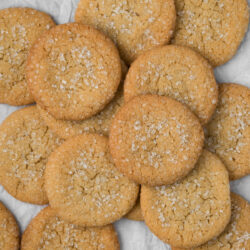
For more delicious dairy free recipes you have to try my Dairy Free Cupcakes and Dairy Free Chocolate Chip Cookies!
Table of Contents
Recipe Ingredients

- Cocoa Powder: Cocoa provides the essential, rich chocolate flavor and is a perfect dairy-free alternative to melted chocolate.
- Vanilla Extract: It offers a subtle but distinct flavor to any baked good.
- Dairy-Free Chocolate Chips: These not only add extra chocolatey richness but also create a gooey, melt-in-the-mouth texture.
See the recipe card for full information on ingredients and quantities.
How to Make Dairy Free Brownies
Step 1: Preheat your oven to 350 degrees Fahrenheit (175 degrees Celsius). Line an 8×8″ metal baking pan with parchment paper and set aside.
Step 2: In the bowl of a stand mixer fitted with the paddle attachment, or in a large mixing bowl using a handheld mixer, add the oil, sugars, and vanilla. Mix on medium speed until combined, about 1 minute.
Step 3: Add the eggs and yolk one at a time, mixing after each addition. Then, mix for 30 seconds. Let the mixture rest for 3 minutes, then repeat by mixing for 30 seconds. Repeat two more times.
Step 4: In a medium mixing bowl, whisk together the cocoa powder, flour, salt, baking powder, and espresso powder (optional).
Step 5: Slowly add the dry ingredients into the wet ingredients along with the chopped chocolate. Continue mixing until no white streaks remain, about 30 seconds.
Step 6: Pour the batter into the prepared pan and bake in the oven for 25-35 minutes, or until a toothpick inserted into the center comes out with a few moist crumbs.
Step 7: Remove from the oven and allow to cool in the pan for 30 minutes before slicing and serving, and enjoy!

Expert Tips
- Chill Before Cutting: For perfectly cut brownies, refrigerate the pan after it has cooled. Chilled brownies are firmer and easier to slice cleanly. Use a sharp knife for best results.
Frequently Asked Questions
I love having a scoop of Ice Cream alongside any brownie I eat which is what I would recommend. In addition fresh fruit like strawberries always pair really well with chocolate treats!
You can enhance the brownies by adding chopped walnuts, pecans, or dairy-free dark chocolate chips. These add-ins contribute additional texture and flavor.
Storage Info
You can store these Dairy Free Brownies in an airtight container at room temperature for 3-4 days, or in the fridge for 1 week. For longer storage, you can freeze them for up to 2 months. Wrap the brownies in plastic wrap and then place them in a freezer-safe bag or airtight container. To reheat, simply thaw at room temperature if frozen, and if desired, warm them in the microwave to your preferred taste.
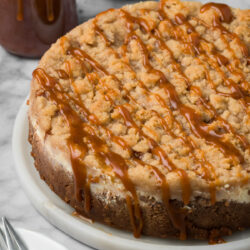
More Dairy Free Desserts To Try
Dairy Free Brownies Recipe
Ingredients
- 3/4 c. refined coconut oil or canola oil
- 3/4 c. granulated sugar
- 1/2 c. brown sugar - packed
- 1 teaspoon vanilla extract
- 2 large eggs + 1 yolk
- 2/3 c. cocoa powder - sifted
- 1/2 c. all-purpose flour
- 1/2 tsp. coarse sea salt
- 1/4 tsp. baking powder
- 1/4 tsp. espresso powder - optional
- 1/2 c. coarsely chopped dairy-free chocolate (see note below) or dairy-free chocolate chips
Instructions
- Preheat the oven to 350 degrees Fahrenheit (175 degrees Celsius). Line an 8×8″ metal baking pan with parchment paper and set aside.
- In the bowl of a stand mixer fitted with the paddle attachment, or in a large mixing bowl using a handheld mixer, add the wet ingredients: oil, sugars, and vanilla. Mix on medium speed until combined, about 1 minute.
- Add the eggs and yolk one at a time, mixing after each addition. Then, mix for 30 seconds.
- Let the mixture rest for 3 minutes, then repeat by mixing for 30 seconds. Repeat two more times.
- In a medium mixing bowl, whisk together the dry ingredients: cocoa powder, flour, salt, baking powder, and espresso powder (optional).
- Slowly add the dry ingredients along with the chopped chocolate. Continue mixing until no white streaks remain, about 30 seconds.
- Pour the batter into the prepared pan and bake in the oven for 25-35 minutes, or until a toothpick inserted into the center comes out with a few moist crumbs.
- Remove from the oven and allow to cool in the pan for 30 minutes before slicing and serving.


Hey I made these today and they were so good and chewy !!! thank you so much !! The brownies that I made before were always cakey or undercook but this one was chewy and fudgy !! I even added m&m ‘ s , lotus cookies and crushed peppermint candy . I did not add any chocolate chunks as I did not have any chocolate bars at hand . I also substituted the espresso powder for my hazelnut freeze dried coffee because its my favourite coffee !
Next im going to make this for my fiance and see what I can do to take it further !
I love what you’ve added! Thank you for sharing that with me! I am glad you found this recipe!
I had never made dairy free brownies before but my friend can’t have dairy so I made for her birthday and I will always use this recipe from now on
Thank you
I love hearing that! I am glad you found this recipe to try. Thank you so much!
I would not make these again. The flavour and texture is not very nice. They are too dry and crumbly even though I only cooked them for 25 minutes. They do not have a fudgey centre and flakey exterior. The taste is a little bit off too, perhaps too much coco. Maybe reduce oil and using something like almond milk instead would help.
Are these brownie ok to freeze over night?
Did you use all purpose flour or almond flour? The recipe says on, but the picture/advertisement is for the other. Thanks!!
All-purpose! I don’t use almond flour for any of my recipes 🙂