October is here which means it is officially time to crank out the pumpkin recipes! Excited? I am! Last night we had the missionaries over for dinner and I made chili and cornbread. For dessert I had prepared these tasty little cheesecake bites. This was my first attempt at baking in my mini cheesecake pan and I had no idea what I was doing. Since I made my own recipe I was unsure of the baking/cooling time…. yeah, I winged it. Turns out that my guesses were pretty spot-on because these came out moist and oh so delicious! Happy October and let the pumpkin madness begin!
Baking Tools & Ingredients You Will Need For This Recipe:

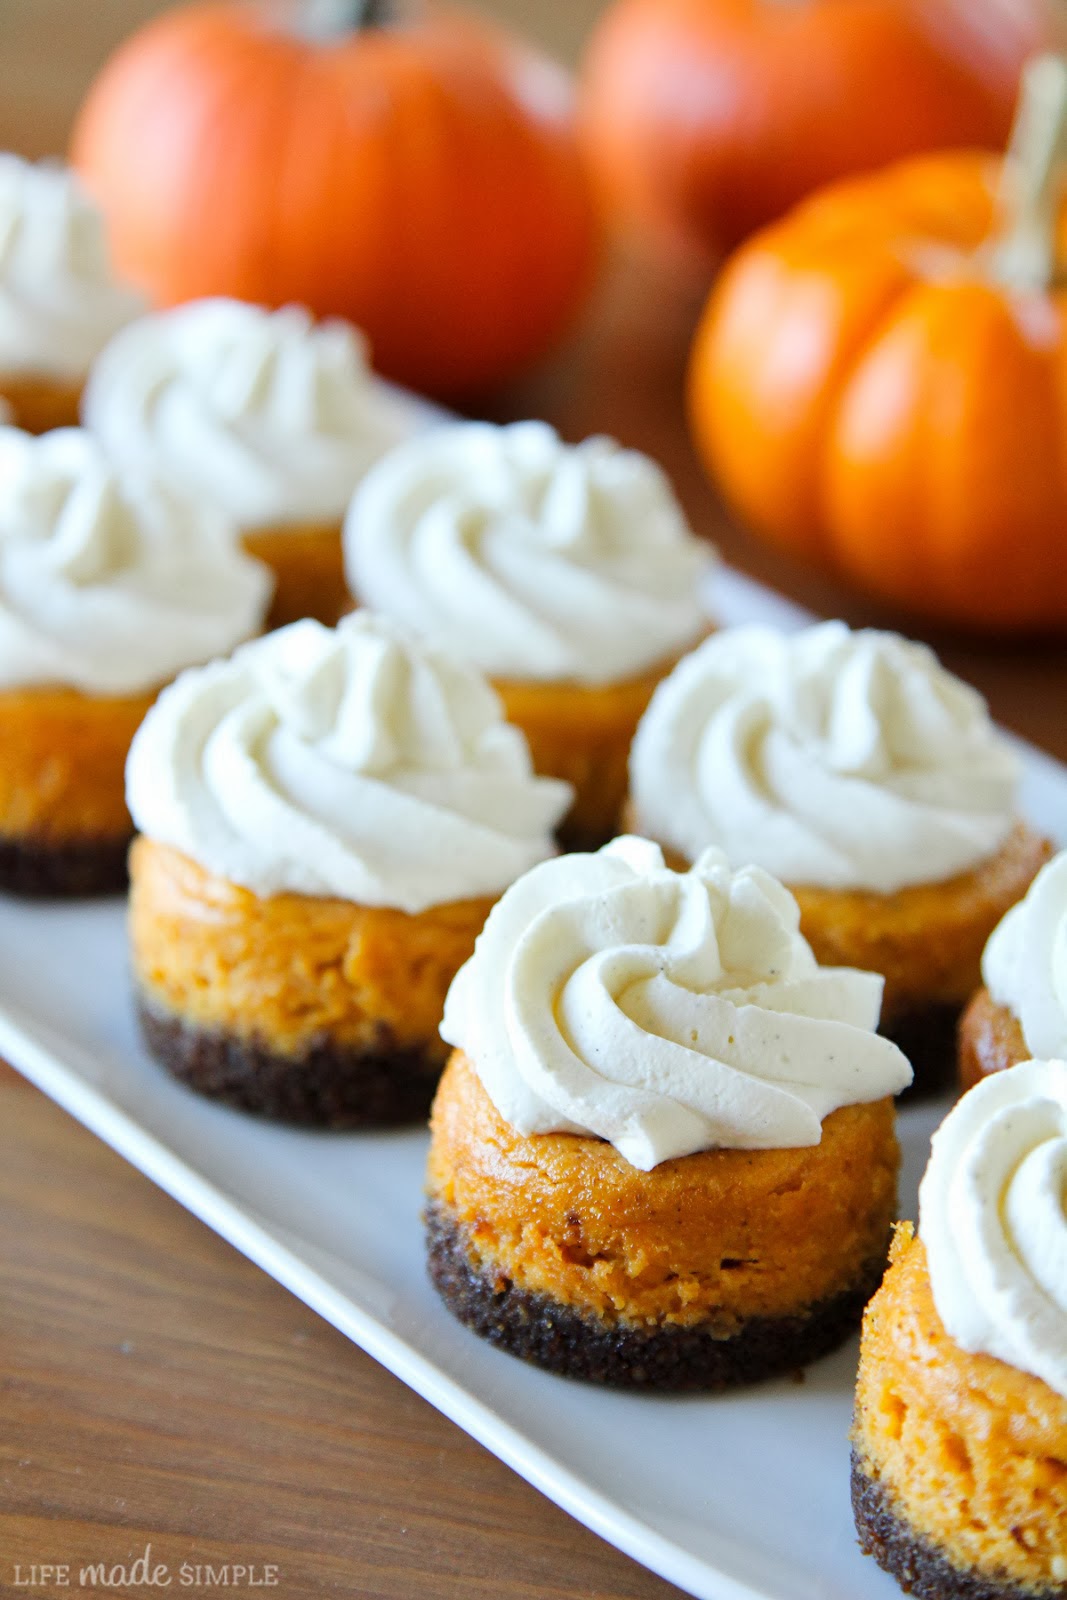
Mini Pumpkin Cheesecakes Recipe
Spiced bites with warm fall flavors make these Mini Pumpkin Cheesecakes the perfect dessert choice for Thanksgiving or your next holiday celebration.
Pin
Rate
Servings: 12 mini cheesecakes
Calories: 176kcal
Recommended Products
Ingredients
- 1 (8) ounces package Original Philadelphia Cream Cheese - room temperature
- 1/2 cup pumpkin puree
- 1/4 cup + 2 tablespoons sugar
- 1 large egg
- 2 tsp heavy cream
- 1/4 teaspoon vanilla
- 1/4 teaspoon ground cinnamon
- 1/4 tsp pumpkin pie spice - (or allspice)
- 1/8 tsp nutmeg
Crust
- 8 gingersnap cookies
- 1 graham cracker
- 1 1/2 tablespoon butter - melted
- 1 1/2 tsp brown sugar
- 1/4 cup pecans
- pinch of salt
Vanilla Bean Whipped Cream
- 1 cup heavy cream
- 1 Tbsp granulated sugar
- seeds from ¼ of a vanilla bean - (or ¼ tsp vanilla bean paste)
- pumpkin pie spice for garnish
Instructions
- Preheat the oven to 350 degrees Fahrenheit (175 degrees Celsius). Lightly grease a mini cheesecake pan with baking or cooking spray. Set aside.
- In the bowl of a food processor, grind all the ingredients for the crust, except for the melted butter. The mixture should resemble slightly coarse crumbs. Remove the mixture and pour the melted butter over. Mix until the crumbs are wet. Press into the bottom of each hole. Place in the oven and bake for 10 minutes.
- While the crust is baking, prepare the cheesecake filling. Beat together the cream cheese, sugar, and pumpkin puree until smooth. Add the spices, vanilla, heavy cream, and egg. Mix until just combined.
- Pour the filling over each crust, dividing evenly. Place in the oven and bake for 20 minutes. Remove from the oven and cool in the pan for 20 minutes before removing the cheesecakes (yes, your cheesecakes will sink a little; this is normal).
- Remove the cheesecakes from the pan using the bottom of a wooden spoon. Use a butter knife to remove the metal bottoms and place the cheesecakes in an airtight container. Refrigerate for 2 hours before serving.
- While the cheesecakes are cooling, prepare the vanilla bean whipped cream. Fit a chilled mixing bowl into your stand mixer. Add the heavy cream, sugar, and scraped vanilla bean seeds. Using the whisk attachment, beat on high for 2–3 minutes until stiff peaks form. Return to the refrigerator until the cheesecakes are ready to be served.
- To assemble, using a mesh sieve, lightly dust the cheesecakes with pumpkin pie spice before or after topping with a swirl of whipped cream. Enjoy!
NOTES
-I used the Chicago Metallic Mini Cheesecake Pan, but you can double the recipe and use a standard-size muffin tin lined with cupcake liners.
To STORE, place the mini cheesecakes in an airtight container and refrigerate them for up to 3 days. For FREEZING, individually wrap each cheesecake in plastic wrap and place them in a freezer-safe bag or container. They will stay good in the freezer for up to 2 months.
To thaw, transfer the cheesecakes to the fridge and let them sit overnight. These cheesecakes are best served chilled, but you can briefly warm them in the microwave if desired.
Nutrition
Calories: 176kcal | Carbohydrates: 14g | Protein: 5g | Fat: 12g | Saturated Fat: 6g | Polyunsaturated Fat: 1g | Monounsaturated Fat: 4g | Trans Fat: 0.1g | Cholesterol: 45mg | Sodium: 206mg | Potassium: 134mg | Fiber: 1g | Sugar: 9g | Vitamin A: 1972IU | Vitamin C: 1mg | Calcium: 101mg | Iron: 1mg
Recipe source: Life Made Simple


I made them today and they are amazing. Perfect. Thank you for sharing the recipe.
Happy to hear that you liked them!
If I dont have vanilla bean how much vanilla extract would you use?
I like the flavor of vanilla so I would do about 1/2 tsp, but if you want it to be more subtle try 1/4 tsp. Hope that helps!
Can’t wait until Thanksgiving to make these! Do you have any idea how much 1 graham cracker equals after grinding? I have a whole box of graham cracker crumbs and just need an idea of how much to use.
I also don’t have a mini-cheesecake pan either, so I’m going to double the recipe, as you suggested to another poster, and make them in my silicone cupcake pans. I’m hoping if I cover them and put in fridge, I should be able to pop them right out! Finger crossed!! 🙂 Thanks!
I would guess about 2 tbsp, but that is just an educated guess! A little more or less wont hurt, I promise! Good luck! Oh, and I’d love to hear how they turn out in the silicone cupcake pans!!!
Thanks! I’m making them now & will let you know how they turn out! Happy Thanksgiving!
OMG! These are SO good! And the silicone cupcake pan worked like magic! The recipe made 5 of them, so if I was cooking for a crowd, I would definitely double the recipe. I sprayed the pan w/ cooking spray, then put 2 Tbs of crust in each & filled them all the way to the top w/ the cheesecake filling. I cooked them for approx. 23-24mins, cooled them for 20, then I covered them with seran and put them in the fridge, still in the cupcake pan. After several hours (at least 4), they popped right out. Perfect size for dessert serving – a true mini-cheesecake! I hope this helps others out there that don’t have a mini-cupcake pan either. Can wait to eat the rest tomorrow! 🙂
Good to hear! Thank you so much for the feedback! I’m glad that they turned out so well. Thanks for giving them a try and for experimenting a bit! Have a happy Thanksgiving!
These look incredible!
I made these! They were delicious! I loved the crust. Thank you! http://www.blogasyoubake.blogspot.com