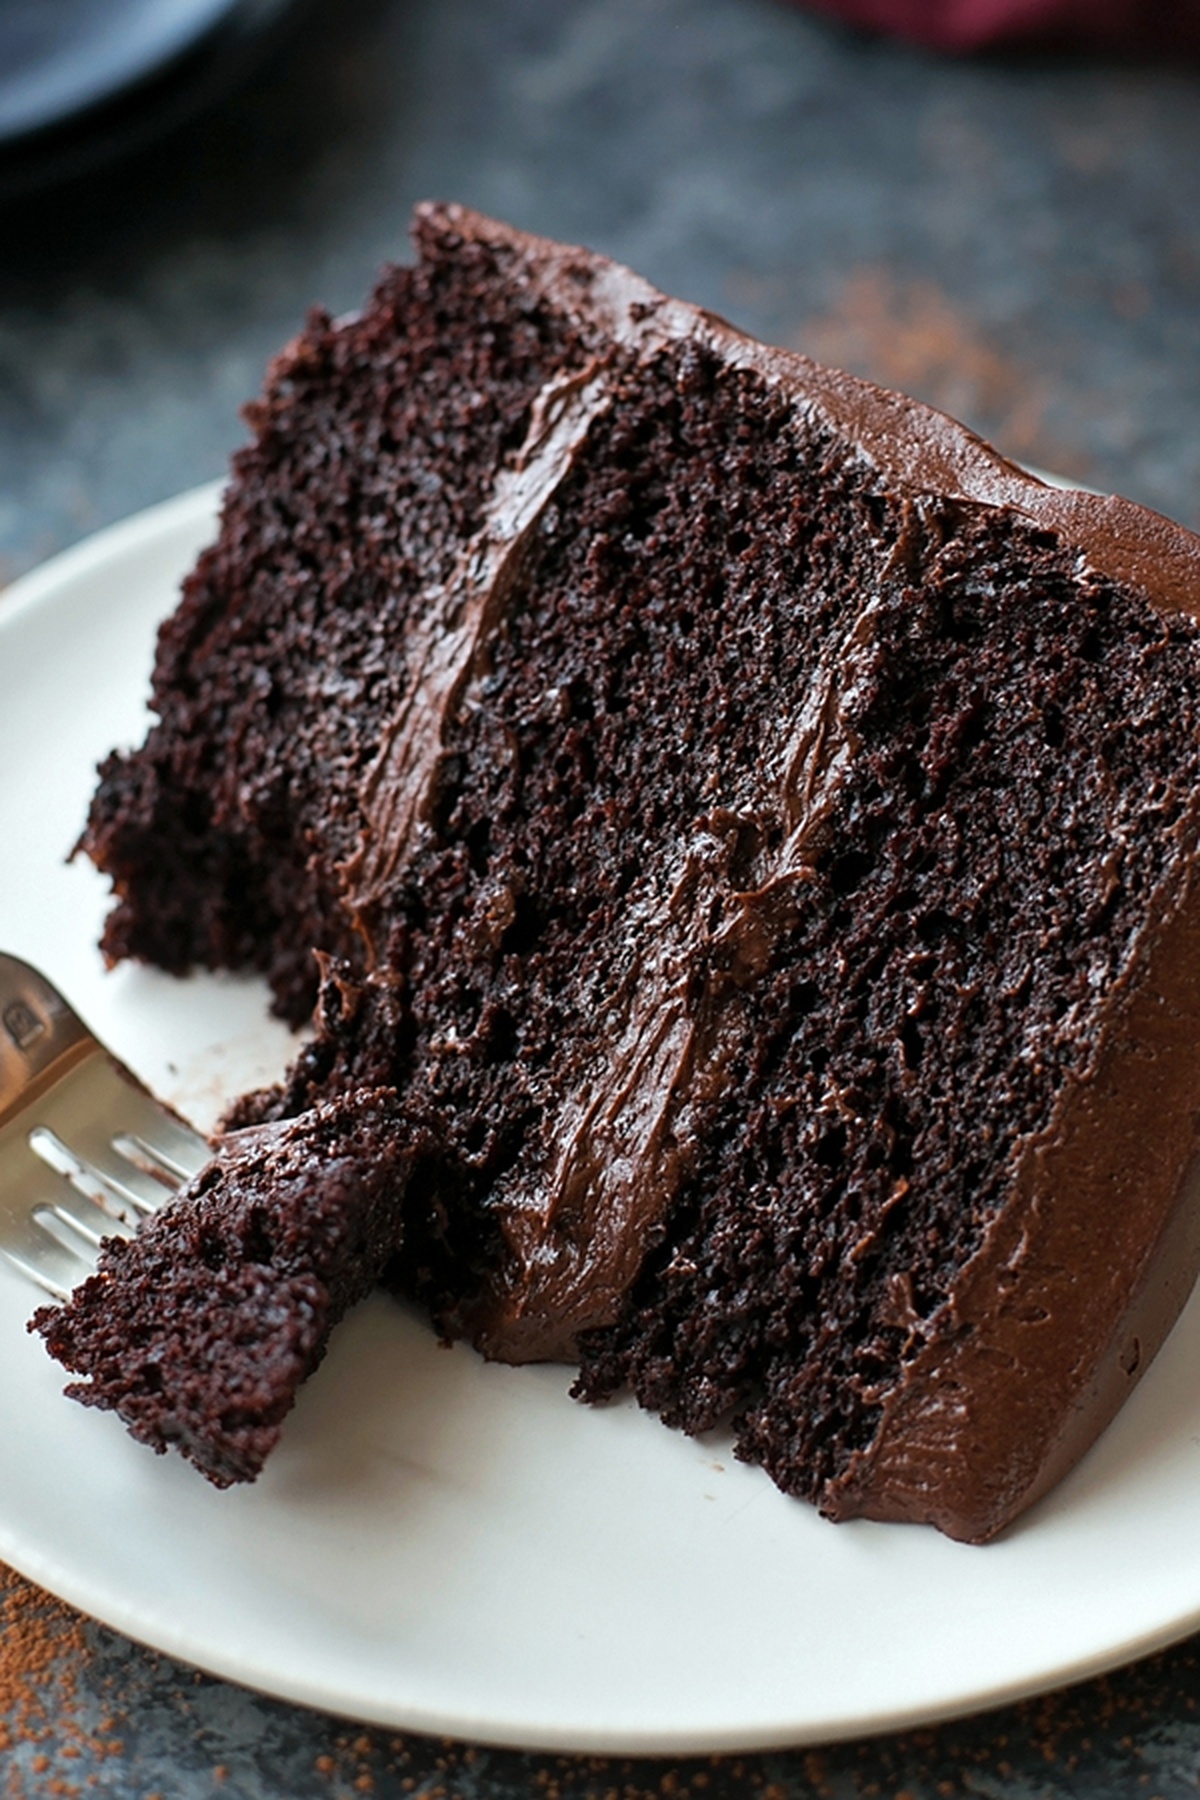
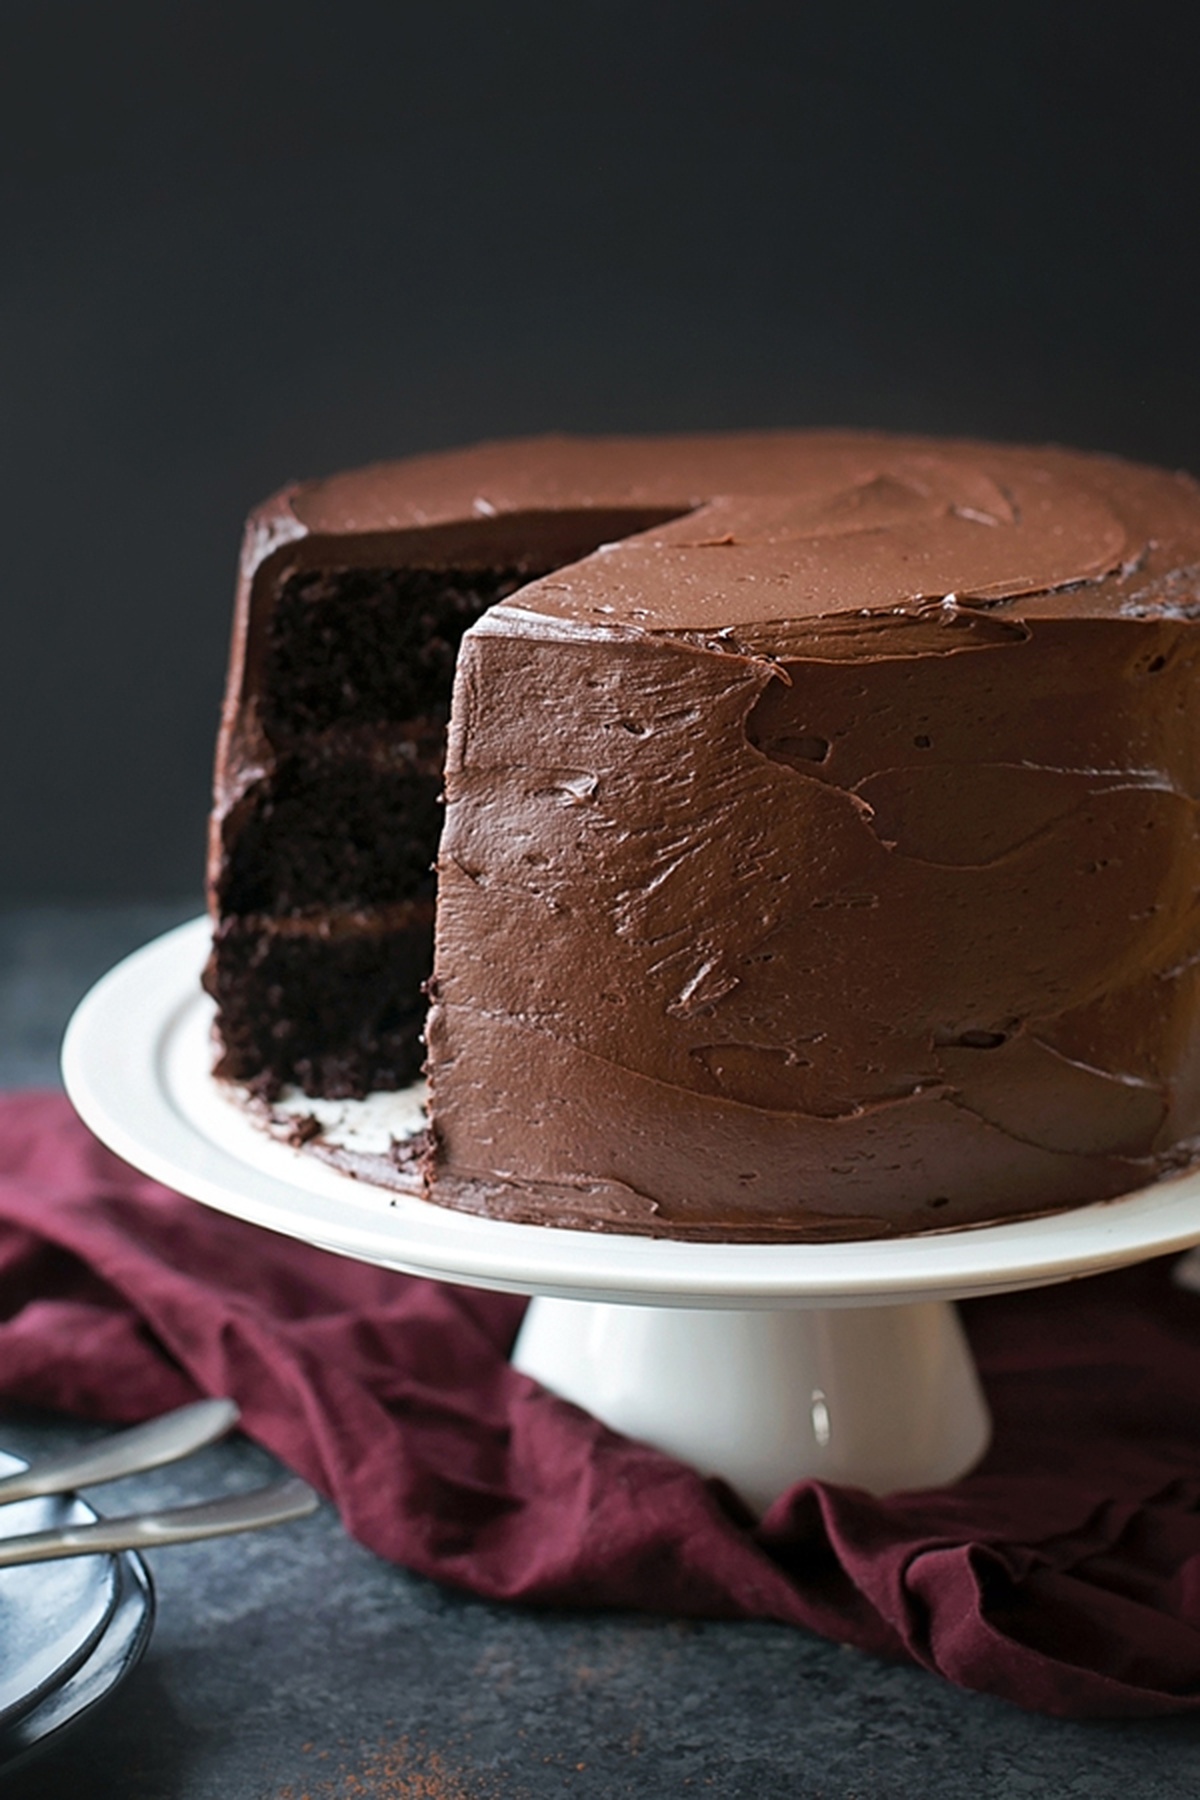
Indulge in this triple-layer Chocolate Blackout Cake. It’s rich, moist, and packed with chocolaty goodness! It’s truly a chocolate lovers dream!

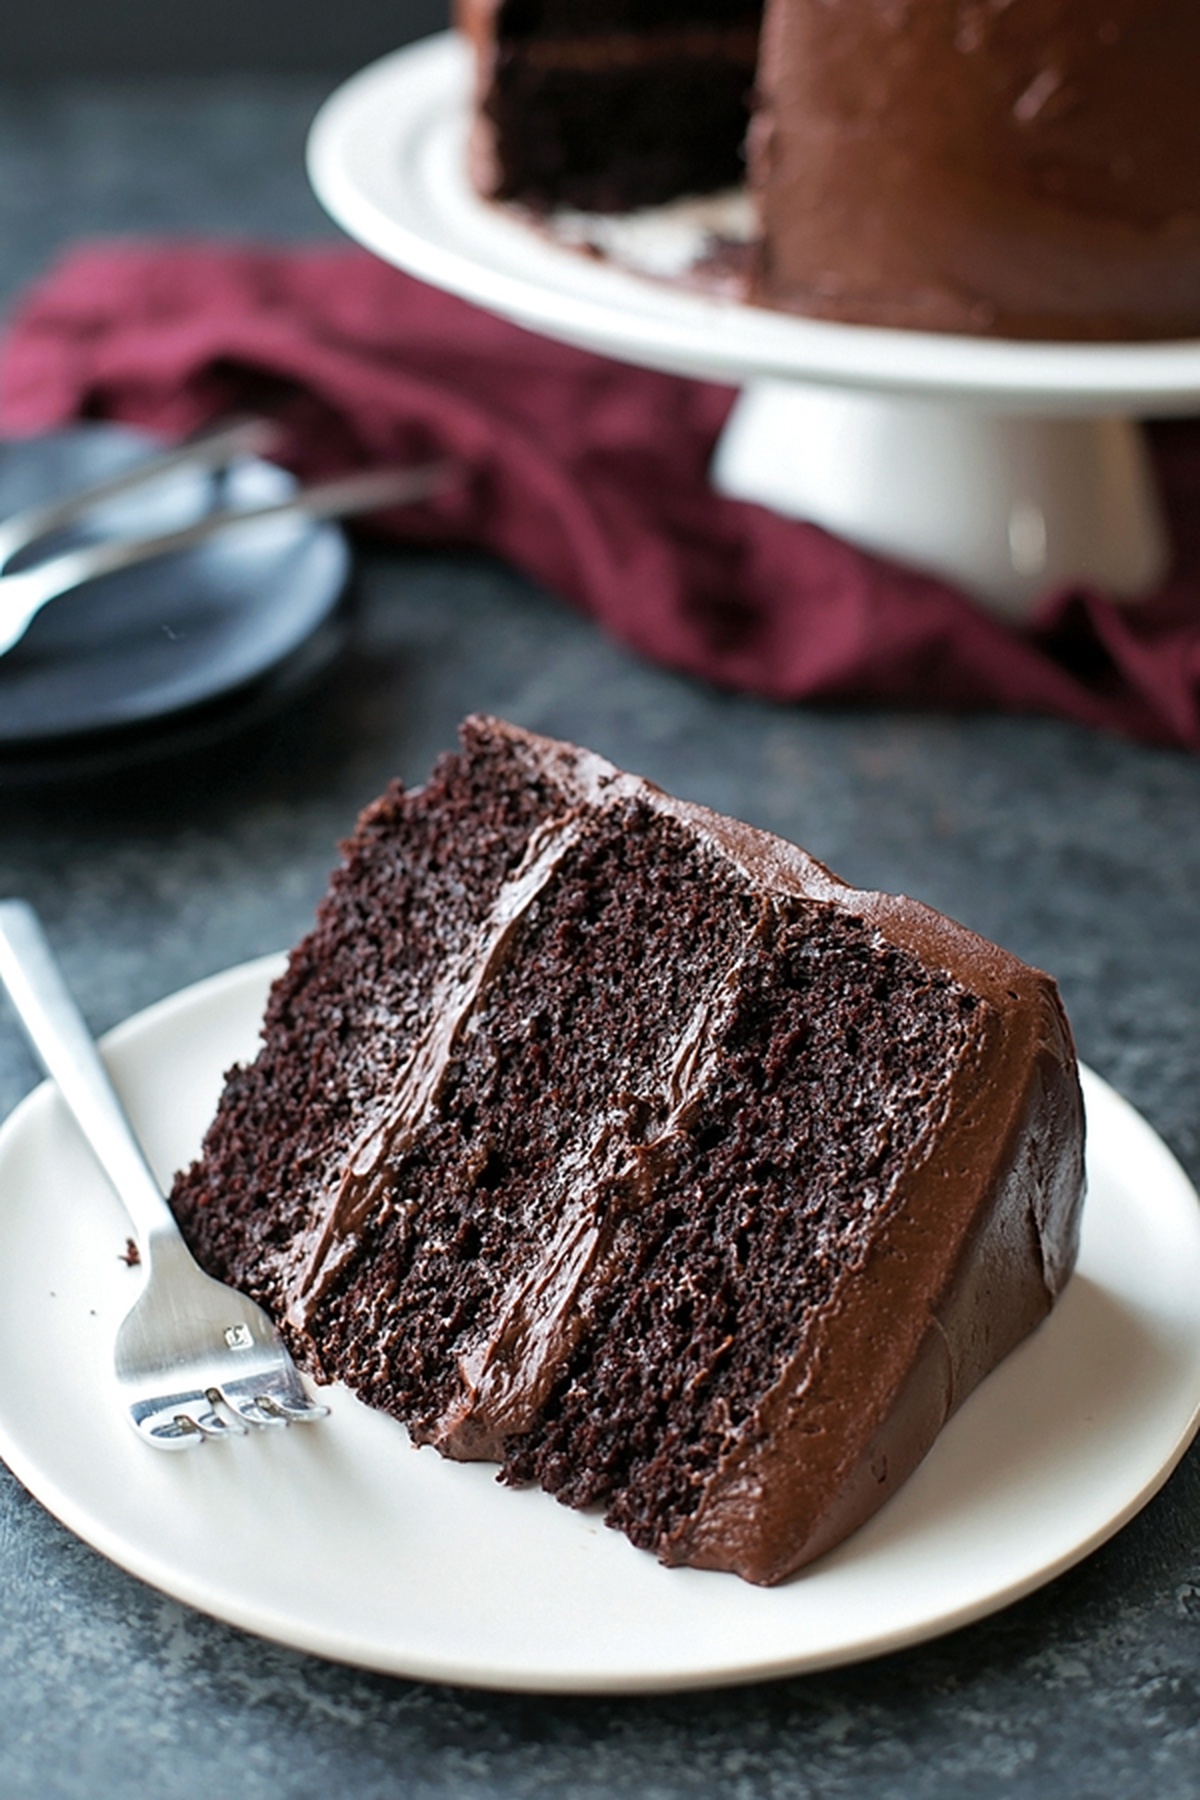
This Chocolate Blackout Cake is the ultimate indulgence for serious chocolate lovers, known for its intensely rich, dark flavor and ultra-moist texture. Three layers of deep chocolate cake are filled and frosted with a luscious chocolate cream cheese frosting. It is so addicting you will want to keep coming back for more!
For more chocolate cake recipes you have to check out my Chocolate Cake, Chocolate Cake Pops, and Healthier Chocolate Snack Cake.
Table of Contents
History of Blackout Cake
The Chocolate Blackout Cake, often called the Brooklyn Blackout Cake, has roots in Brooklyn, New York, where it was famously crafted by Ebinger’s Bakery in the early 20th century. Named after the wartime blackout drills during World War II, the cake was designed to be intensely dark, with layers of chocolate cake, pudding-like filling, and chocolate cake crumbs on the outside.
Why We Love This Chocolate Cake
- This cake is ideal for chocolate lovers without being overly sweet.
- Layers of moist cake, creamy pudding, and smooth frosting create a variety of textures.
- This cake keeps well in the fridge for several days.
Recipe Ingredients
Unsweetened Cocoa Powder – Scharffenberger or Guittard Cocoa Rouge is ideal for a rich, intense chocolate flavor that truly stands out.
Pure Vanilla Extract – Quality vanilla boosts flavor—well worth it!
Espresso Powder – This is optional but a small amount of espresso powder intensifies the chocolate even more.
For a full list of ingredients and amounts, see the recipe card below.
Variations
Pudding Filling – Instead of traditional frosting between layers, use a chocolate pudding filling for a creamy, custard-like texture that makes each bite extra moist and indulgent.
Heavy Cream – Substitute with milk or half-and-half, adjusting to reach a spreadable consistency in the frosting.
How to Make Chocolate Blackout Cake
Step 1: Preheat oven to 350 degrees Fahrenheit (175 degrees Celsius). Generously spray or butter and flour three 9-inch cake rounds.
Step 2: Whisk together the dry ingredients (flour, sugar, cocoa, baking soda, baking powder, and salt) in a stand mixer on low speed until combined.
Step 3: Add the wet ingredients (eggs, sour cream, buttermilk, warm water, oil, and vanilla) to the mixer. Beat on medium speed until smooth, about a minute.
Step 4: Divide the batter evenly between the three pans (about 3 cups of batter per pan).
Step 5: Place in the oven and bake for 30-35 minutes or until a cake tester inserted into the center comes out clean. Keep an eye on it to avoid over-baking.
Step 6: Remove from the oven and allow the cakes to cool in the cake pans for 20 minutes, then invert onto wire racks. Allow to cool completely before frosting.
For the Chocolate Frosting
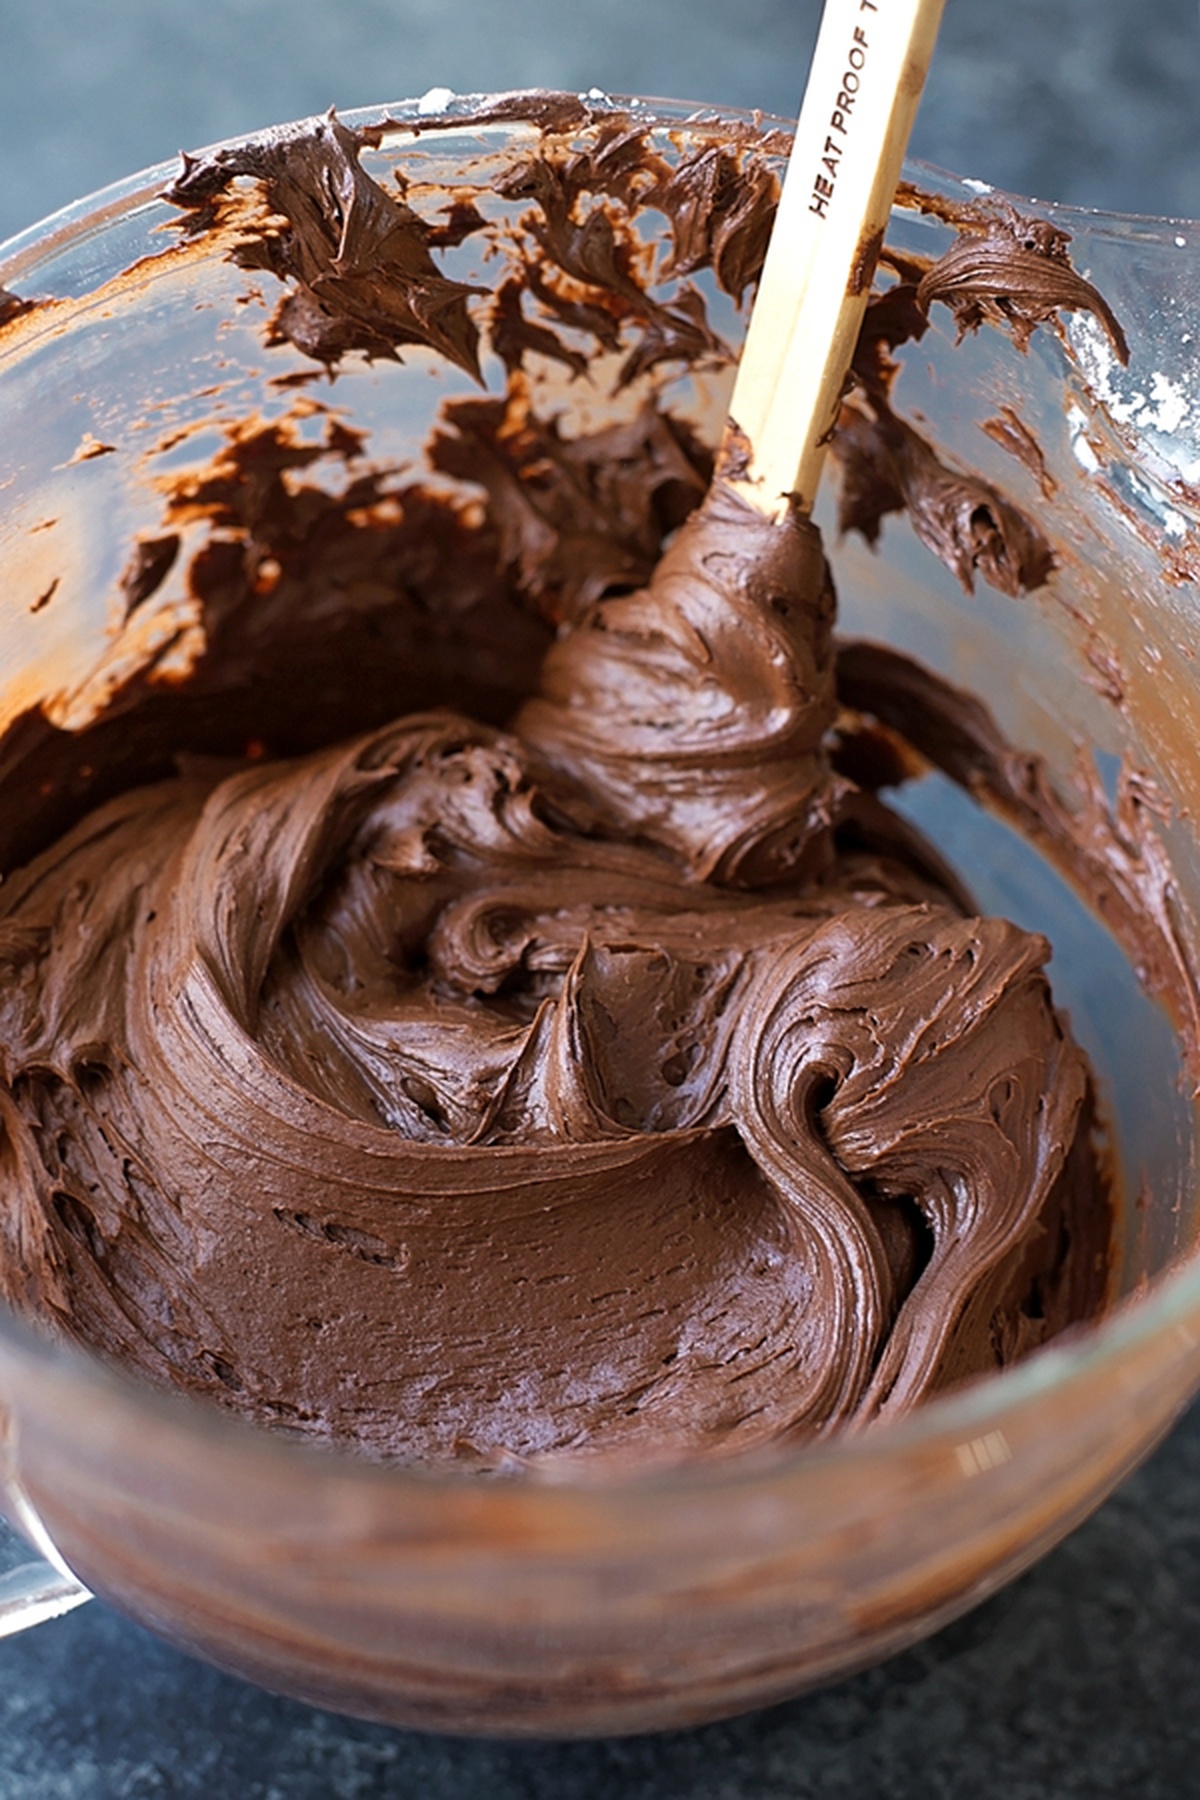
Step 1: In a large bowl (or the bowl of a stand mixer), beat the butter and cream cheese until light and fluffy, about 2-3 minutes.
Step 2: Carefully add in the cocoa powder, vanilla, and kosher salt; beat until combined.
Step 3: With mixing speed on low, gradually add the powdered sugar, one cup at a time. When all the powdered sugar has been added, beat in heavy cream, then add more to create a spreadable consistency. The frosting should be on the thicker side, though it will thicken more when refrigerated.
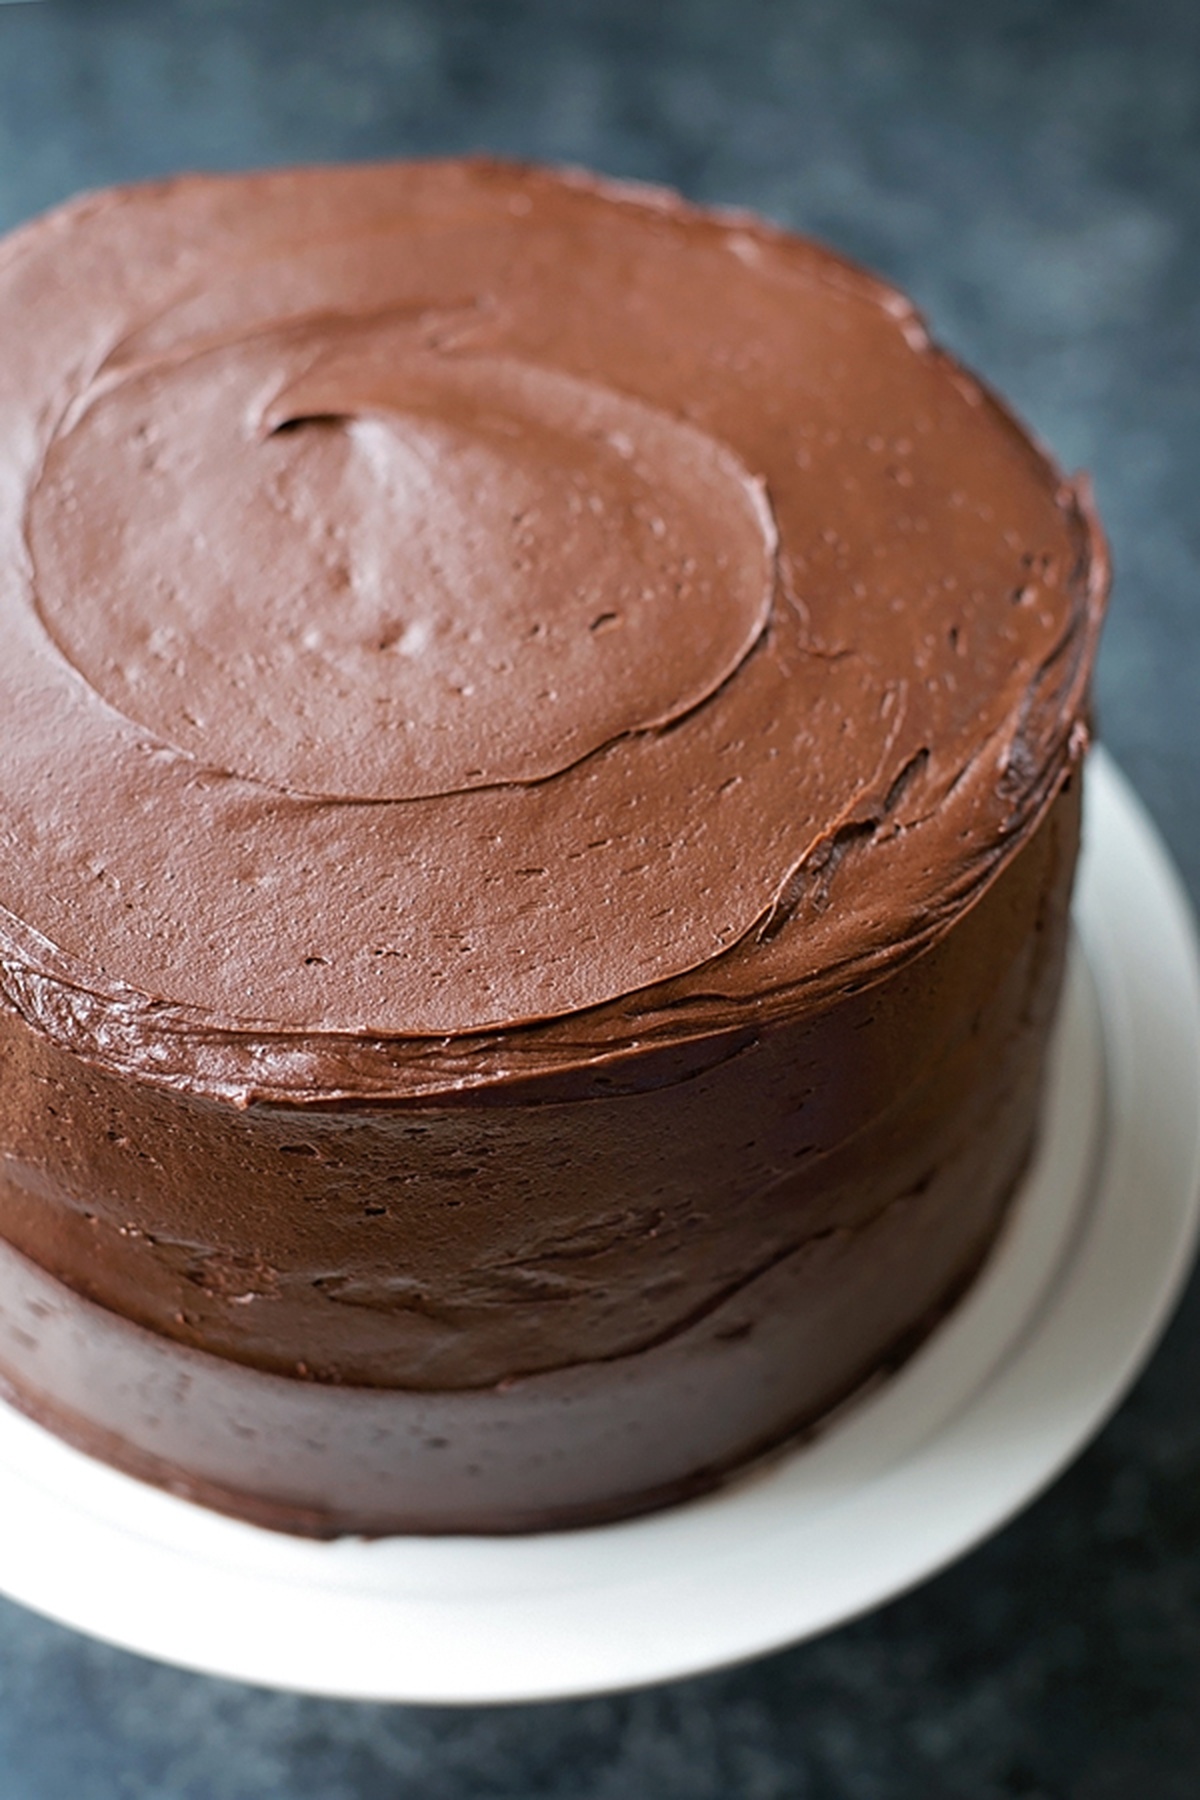
Step 4: Spread the frosting between the cooled layers, then on the sides and on top. Spread into a smooth, even layer using an offset spatula. Decorate as desired. Place in the refrigerator to chill for at least 1 hour before serving.
Expert Tips
Parchment Paper – Place parchment paper around the base of the cake while frosting to catch excess frosting for a clean presentation.
Leveling Layers – Use a serrated knife to gently slice through each layer, giving a smooth, even cut for stacking.
FAQs
If a cake tester isn’t available, insert a toothpick into the center of the cake. When it comes out with only a few moist crumbs (not wet batter), the cake is done. Avoid over-baking to keep the layers moist and tender.
Apply a thin layer of frosting and refrigerate for 15–20 minutes before adding the final frosting layer to lock in crumbs.
Storage Information
STORE This Chocolate Blackout Cake in an airtight container in the refrigerator for up to 5 days.
To FREEZE, wrap individual slices tightly in plastic wrap, then place them in a freezer-safe container or bag. Freeze for up to 2 months. To serve, thaw slices in the fridge and enjoy chilled or at room temperature.
Irresistible Desserts for Your Sweet Tooth

Chocolate Blackout Cake Recipe
Ingredients
- 3 cups all-purpose flour
- 3 cups granulated sugar
- 1½ cups quality unsweetened cocoa powder - I prefer Scharffenberger or Guittard Cocoa Rouge
- 1 Tbsp baking soda
- 1½ tsp baking powder
- 1½ tsp coarse kosher sea salt - not fine
- 4 large eggs
- 1/2 cup sour cream
- 1 cup buttermilk
- 1½ cups warm water + ½ tsp. espresso powder - espresso is optional
- ½ cup vegetable oil
- 1 Tbsp vanilla extract
For the Frosting
- 1½ cups unsalted butter - softened
- 8 oz cream cheese - softened
- 1½ cups unsweetened cocoa powder
- 1 Tbsp vanilla extract
- 1/8 teaspoon salt
- 7 cups powdered sugar
- 1/4 cup heavy cream - more if needed
Instructions
- Preheat oven to 350 degrees Fahrenheit (175 degrees Celsius). Generously spray or butter/flour three 9-inch cake rounds.
- Whisk together the dry ingredients (flour, sugar, cocoa, baking soda, baking powder, and salt) in a stand mixer on low speed until combined.
- Add the wet ingredients (eggs, sour cream, buttermilk, warm water, oil, and vanilla) to the mixer. Beat on medium speed until smooth, about a minute.
- Divide the batter evenly between the three pans (about 3 cups of batter per pan).
- Place in the oven and bake for 30-35 minutes or until a cake tester inserted into the center comes out clean. Keep an eye on it to avoid over-baking.
- Remove from the oven and allow the cakes to cool in the cake pans for 20 minutes, then invert onto wire racks. Allow to cool completely before frosting.
For the Frosting
- In a large bowl (or the bowl of a stand mixer), beat the butter and cream cheese until light and fluffy, about 2-3 minutes.
- Carefully add in the cocoa powder, vanilla, and kosher salt; beat until combined.
- With mixing speed on low, gradually add the powdered sugar, one cup at a time. When all the powdered sugar has been added, beat in heavy cream, then add more to create a spreadable consistency. The frosting should be on the thicker side, though it will thicken more when refrigerated.
- Spread the frosting between the cooled layers, then on the sides and on top. Spread into a smooth, even layer using an offset spatula. Decorate as desired. Place in the refrigerator to chill for at least 1 hour before serving.


Can this be made in a 9×13 pan? That way, no problem removing from pan. Thanks!
It’s far too big for a 9×13 pan. You would need to halve the recipe. There shouldn’t be any issues with removal. A piece of parchment paper at the bottom of your pans + baking spray or butter & cocoa powder will ensure you get a clean release.
Do u bake the cack using Fahrenheit degrees or Celsius ?
As well I wanted to aske about the ‘c’ in your recipe.. it stands for ‘cup’ right?
Thanks .xx.
Fahrenheit, and yes, c. stands for cup 🙂
I made this cake last night because I am a chocoholic and it looks SUPER delicious. I wanted to make a different chocolate cake and
the buttermilk, sour cream and cream cheese drew me in. I followed the recipe exactly. It baked beautifully and came out looking exactly like your picture… actually better. But the taste was NOT to our liking. There is TOO much Cocoa and salt for our taste. I have practically an entire cake to trash and I spent almost $50 on the ingredients. It’s a shame… 3 people tasted it and none of us liked it. I am a retired professional baker/decorator/owner of over 30 years. This is the FIRST chocolate cake that I met and did not like. I used Ghirardelli chocolate. I didn’t notice only 3 people rated BEFORE I made this cake and 2 of the 3 people did not make the cake….it was my fault for not reading the ratings beforehand. Smh
Correction… 2 of the 3 made the cake.
Use unsalted butter in the recipie
Sorry to hear that Tracy. It’s definitely supposed to be a rich, dark chocolate cake. You can always cut back on the salt to 1 teaspoon, however, if you’re using coarse kosher sea salt (not fine table salt) it shouldn’t be an issue.
Natalie this cake was truly incredible! I’ve been craving a good chocolate cake and this was top notch. Super moist, super chocolatey, and down right delicious. I’ve tried many chocolate cake recipes and I must say this one is by far the best! Thank you for the recipe!
So, I’m currently in the process of making the cake and I have two things to say – first one is that the frosting is waaaaaaay too sweet for me (but hey, different people like different stuff) and the second – I have no idea what happened, but as far two of my cakes have broken in half. :c
I don’t know why that happened and was wondering if you could have any tips for me.
Right now the cake is in my fridge, half covered with frosting, and bound with pan (the type that has a removable bottom) and in an hour I’ll try to get it out and hope it stays glued to itself. ;-;
Hi… this is Tracy. As a professional baker for super moist cakes like this one I use parchment paper in the bottom to keep it from sticking. Spray the pans, apply parchment paper and spray the paper. Also you HAVE to cool the cakes IN THE PANS for 15 minutes to finish setting and then flip onto a wire rack to finish cooling. It shouldn’t break then. Another problem may be a tad too much liquid if not measured correctly. Hope this helps.