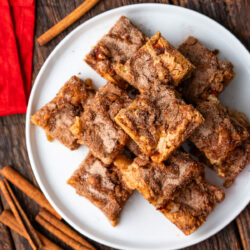
Get ready for a chocolate treat! These Fudgy Flourless Brownies are gluten-free, super chewy, and come together in just 30 minutes.

These Fudgy Flourless Brownies are rich, dense, and irresistibly chocolatey, with a melt-in-your-mouth texture that rivals any classic brownie. Made without flour, they get their decadent structure from melted chocolate, butter, and sugar, creating an ultra-smooth crumb and deep cocoa flavor in every bite.
No need for strange ingredients to enjoy these intense fudgy flourless brownies! If you need more must-make flourless recipes, you’ll also love Flourless Oatmeal Chocolate Chip Cookies, Flourless Nutella Raspberry Cake, and Flourless Peanut Butter Cookies.
Table of Contents
Why We Love These Fudgy Brownies
- Ready in just 30 minutes, Fudgy Flourless Brownies are perfect for last-minute desserts.
- These brownies are dense and moist, making every bite delightful.
- With no flour, Fudgy Flourless Brownies can be a slightly healthier chocolate treat that’s also gluten free.
Recipe Ingredients
Semisweet Chocolate – We really prefer Ghirardelli chocolate for its deep, smooth flavor, but any high-quality semisweet chocolate will work. It adds richness and depth that makes the brownies taste indulgent and intense.
Unsweetened Cocoa Powder – For a deeper, more intense chocolate flavor, go with Dutch-process cocoa powder. It gives the brownies a dark, almost bittersweet taste.
Vanilla Extract – Adds a mellow sweetness and rounds out the richness of the chocolate.
For a full list of ingredients and amounts, see the recipe card below.
How to Make Fudgy Flourless Brownies
Step 1: Preheat the oven to 350°F (175°C). Line an 8×8 or 9×9-inch square pan with foil (prefer a metal one), then lightly spray or butter, and set aside.
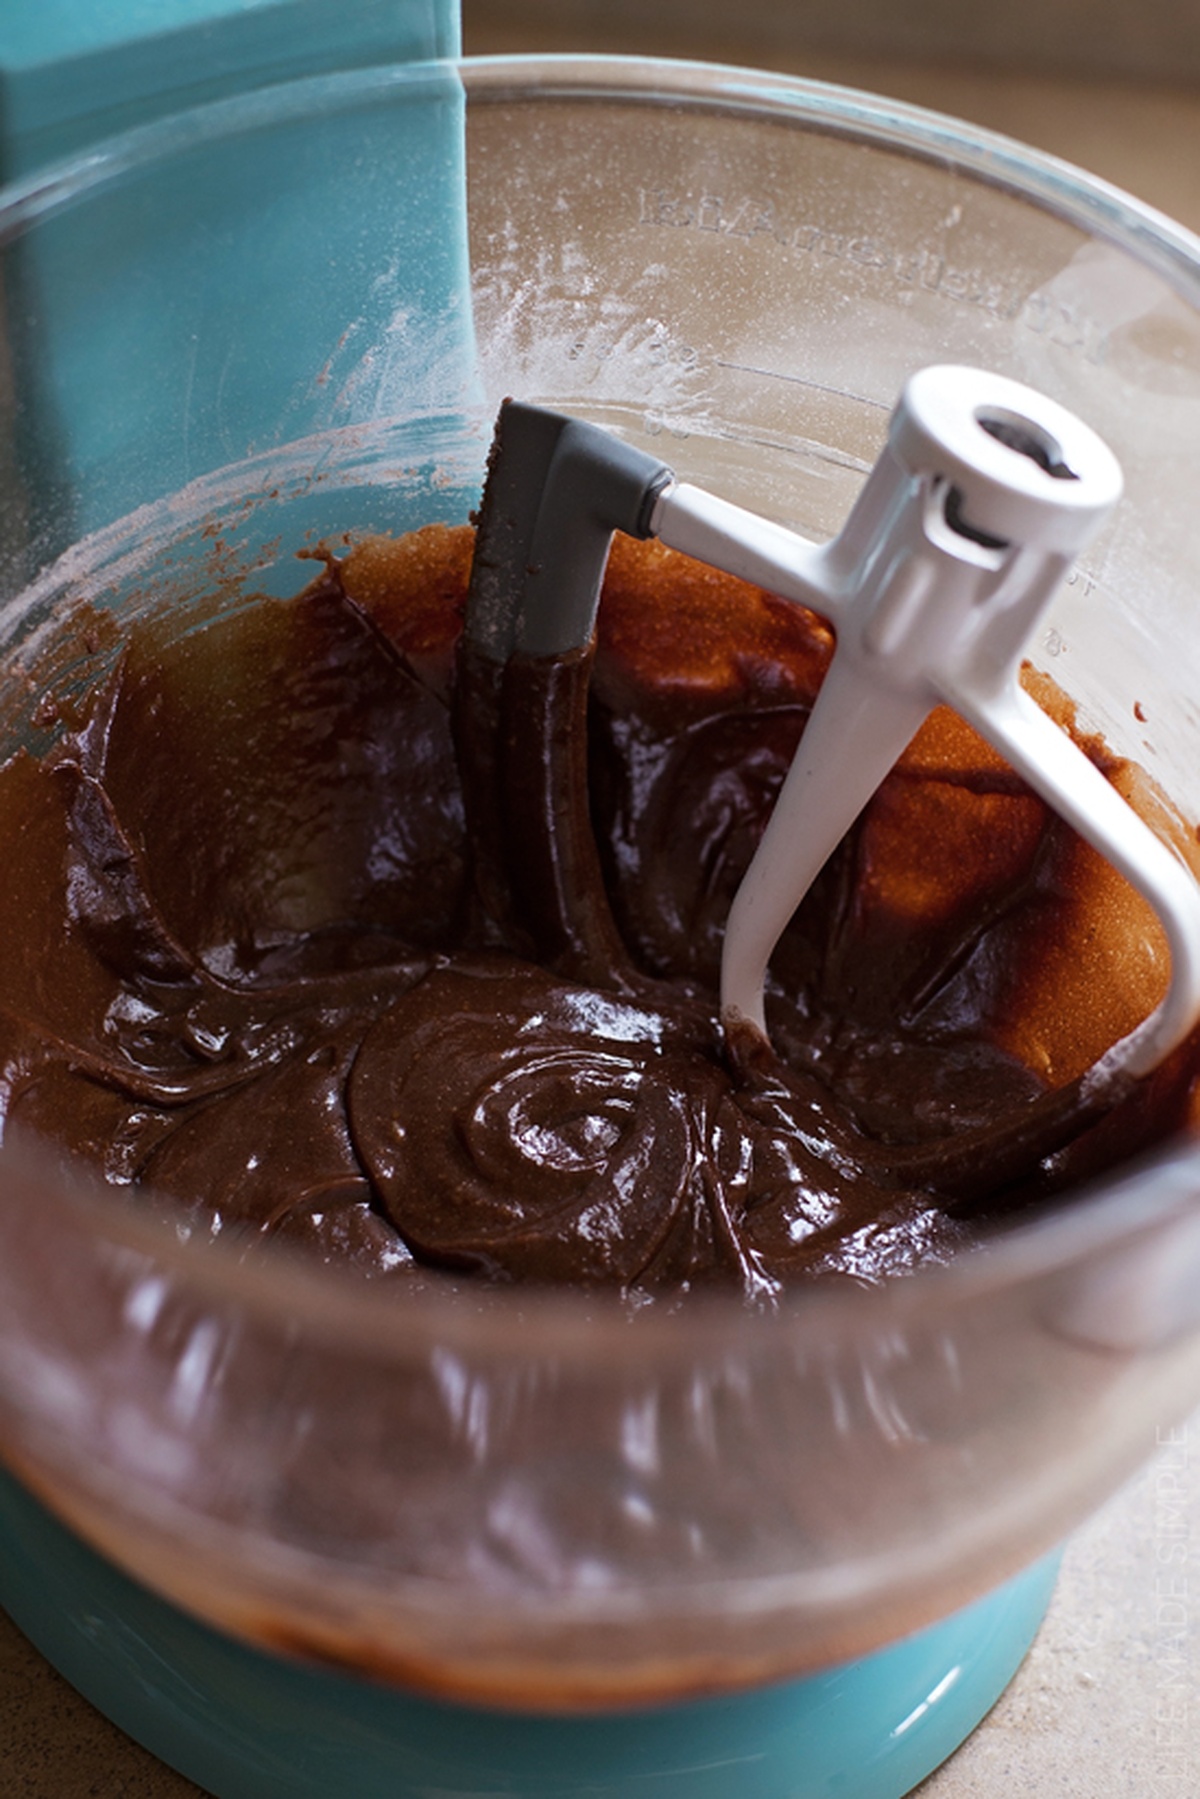
Step 2: In a small saucepan set over low heat, melt the butter, then add the sugar. Once the sugar is incorporated, add the chopped chocolate, stirring until smooth. Remove from the heat and beat for 2 minutes with a hand mixer or whisk. Add the eggs, one at a time, then the vanilla extract.
Step 3: Using a mesh sieve (or a sifter), sift the cocoa powder and cornstarch into the saucepan, then add the salt. Stir together, then beat the batter vigorously for 1-2 minutes. I like to use a hand mixer for this on medium speed. Beat until the batter is smooth and shiny.
Step 4: Pour the batter into the prepared pan and bake for 22-30 minutes or until the brownies are set in the center, taking care not to over-bake. Remove from the oven and let cool in the pan for 45 minutes before removing and slicing.

Expert Tips
Check Doneness Early – Start checking for doneness at the 22-minute mark by inserting a toothpick into the center. It should come out with a few moist crumbs—not clean—for a rich, fudgy texture.
Line with Parchment Paper – For easier removal and cleaner edges, line the pan with parchment paper. Leave an overhang on the sides so you can lift the brownies out without breaking or sticking.
FAQs
Yes, allow the brownies to cool completely in the pan before slicing. This helps set the texture and makes cutting easier, resulting in cleaner slices.
Yes, you can add mix-ins such as nuts or chocolate chips to the batter. Fold them in gently after the batter is fully mixed for an extra burst of flavor and texture.

Storage Info
STORE Fudgy Flourless Brownies in an airtight container at room temperature for up to 4 days. For longer storage, FREEZE them in a single layer, then transfer them to a freezer-safe bag or container for up to 3 months.
To REHEAT, microwave individual brownies for 15-20 seconds or warm them in a preheated oven at 350°F (175°C) for 5-10 minutes.
More Tasty Brownies to Try

Fudgy Flourless Brownies Recipe
Ingredients
- 6 tbsp unsalted butter
- 3/4 cup granulated sugar
- 8 oz semisweet chocolate - chopped
- 2 eggs - room temperature
- 1 tsp vanilla extract
- 1 tbsp unsweetened cocoa powder
- 3 tbsp cornstarch
- 1/4 tsp salt
Instructions
- Preheat the oven to 350°F (175°C). Line an 8×8 or 9×9-inch square pan with foil (prefer a metal one), then lightly spray or butter, and set aside.
- In a small saucepan set over low heat, melt the butter, then add the sugar. Once the sugar is incorporated, add the chopped chocolate, stirring until smooth. Remove from the heat and beat for 2 minutes with a hand mixer or whisk. Add the eggs, one at a time, then the vanilla extract.
- Using a mesh sieve (or a sifter), sift the cocoa powder and cornstarch into the saucepan, then add the salt. Stir together, then beat the batter vigorously for 1-2 minutes. I like to use a hand mixer for this on medium speed. Beat until the batter is smooth and shiny.
- Pour the batter into the prepared pan and bake for 22-30 minutes or until the brownies are set in the center, taking care not to over-bake. Remove from the oven and let cool in the pan for 45 minutes before removing and slicing.


Natalie this recipe is incredible!!
I wanted to make it exactly per your instructions but I only had 4oz carob bits no chocolate. So I used 4oz carob bits 4oz sugar-free & salt-free smooth peanut butter and substituted the same amount of cornstarch with tapioca flour. The result: heavenly fudgey brownies with a hint of peanut butter and a crispy top. Had to bake them for 25min. And last minute put the pan under grill for extra crispy top. Amazing. The only thing I found was when I added the eggs they started to cook so next time, once off the heat, I’d let the batter cool for 10min before adding eggs.
Keep the recipes coming!
Love this recipe, thanks for posting it. I tried it without sugar and used 1tbsp of maple syrup instead. It turned absolutely brilliant. A little bit crispy on the top and chewy instead. Will bake it definitely again.
Amazing! Best gluten free brownies ever!
Thanks Audra!!
This was the best brownies I’ve ever made, the taste is perfect. I used baking powder instead of soda and it turned out just fine.
Thanks Rachel! I’ll have to try them with baking powder next time!
I didn’t think these called for either baking powder OR baking soda…?
They don’t 🙂
Can you freeze these brownies? If so, any special thawing methods needed?
Hi Jessi! I’ve never frozen them before, but I don’t see why you wouldn’t be able to. I’d thaw them in the container or bag so they stay nice and moist. Hope that helps!